How to Clean Grout with Steam (No Bleach): Step-by-Step
Dirty grout is one of the easiest places to misunderstand steam cleaning.
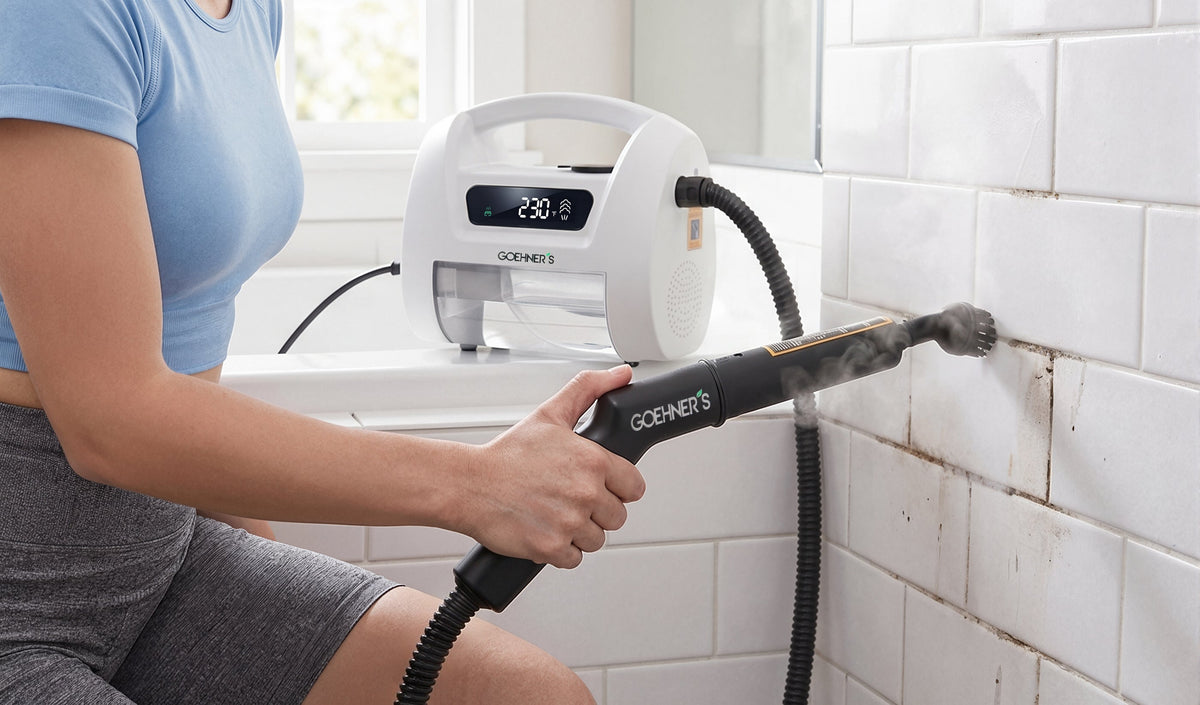
Steam does not magically erase a permanent stain in one pass. What it does well is soften surface grime in the grout line so the brush attachment can lift it out of the line, and a dry towel then picks up the loosened residue and leftover moisture. For most shower-wall, bathroom-tile, or kitchen-backsplash jobs, the whole routine is short: test the material, steam and brush along the line, wipe while it is still warm, then reseal the grout once it dries.
If your grout looks gray, sticky, or dark around the shower, sink, kitchen floor, or backsplash, here is the practical workflow.
Key takeaways
- Fit the brush attachment to the nozzle and steam-and-brush in one pass. The steam softens the buildup while the bristles do the mechanical work in the same motion — bare steam with no brush rarely finishes the job.
- Hold the nozzle about 1 inch (2.5 cm) from the line and keep it moving. Aim into the grout channel, not across the whole tile.
- Cement grout takes steam well. Silicone caulk should be steamed gently and not scrubbed with a stiff brush, and epoxy or pre-mixed grout is heat-sensitive, so keep passes brief and the setting low.
- Steam can weaken the existing sealer and open the pores of cement grout. After it dries fully, plan to reseal (typically after 24–48 hours) so it does not re-soil faster.
- That "grease vanishes in one swipe" clip you saw is a sped-up demo. Real grout work takes a few minutes per section, repeat passes on the worst spots, and a wipe while it is warm.
Why use steam before reaching for bleach?
Bleach can look like the fastest answer, but it is not always the best first move for grout. In many homes, gray or sticky grout is caused by surface buildup: soap residue, body oil, cooking grease, dust, and moisture sitting in the grout line. Bleach mainly lightens the appearance. If oil, soap residue, and dust are still packed into the line, the color can look brighter while the buildup stays put.
Steam with a brush attachment works differently. In one pass the heat softens the buildup and the nozzle's bristles lift it out mechanically along the line, and once you have steamed a small section the towel picks up the loosened residue and leftover moisture. When the problem is mostly surface grime, that is closer to removing the mess than to only brightening it, and it can help the grout stay visibly cleaner for longer before the next clean.
Bleach is not off-limits. Just treat it as a later choice, when the surface can handle it and the product label allows it. Ventilate, never mix bleach with other cleaners, and test an inconspicuous area first. If the smell bothers you, do not force it in a small, closed bathroom.
Before you start: is steam right for this surface?
Steam is useful on many sealed tile and cement grout areas, but not on every surface. For the full list of surfaces steam should never touch, read What Not to Steam Clean.
Use extra caution or skip steam if you are dealing with:
- cracked grout or loose tiles
- unsealed natural stone
- painted grout
- damaged caulk
- laminate or wood-look surfaces near the grout line
- surfaces where the manufacturer says not to use steam
A quick note on two things people get wrong:
- Silicone caulk (the flexible bead in corners and around the tub) cleans up well with steam alone. Steam it gently and wipe — do not go at it with a stiff wire or metal brush, which can tear or gouge the bead. A soft brush or cloth is enough.
- Epoxy grout and some pre-mixed grouts are more sensitive to concentrated heat than standard cement grout. If your grout is epoxy or you are not sure, keep passes brief and stay on a low setting rather than parking high steam on one spot.
If you are unsure about any of this, test a hidden spot first (next step).
What you need
You do not need a complicated setup. You need:
- a steam cleaner with a small detail nozzle and its nylon brush attachment — steam cleaners come with brush heads that fit onto the nozzle, so you steam and brush in one motion (skip stiff metal brush heads on caulk and softer grout)
- dry towels or dry cloths
- clean water
- optional: a soft toothbrush for delicate corners
Do not add chemical cleaners into the water tank unless your machine's manual specifically allows it. Goehner's SteamVex can use tap water, but distilled or purified water is the best choice to reduce scale and mineral buildup.
Step 1: Test a hidden area, then work in small sections
Do not start on the whole wall or floor. Pick a small, inconspicuous spot — behind the toilet, a low corner, under a shelf — and run one short pass on a low setting, brush lightly, wipe with a dry towel, and let it dry.
If you see no discoloration, clouding, lifting, loose grout, or surface change after it dries, continue. Then work in small sections rather than the whole surface at once — a section of roughly 2–3 feet of grout line is a manageable amount to steam, brush, and wipe before it cools. On a vertical shower wall, start higher and work down. On a floor, start farthest from the door and work toward your exit.
If there is loose hair, grit, or debris, sweep or wipe it away first so steam does not turn it into paste in the line. On most bathroom wall tile, light dust simply comes off during steaming and brushing, so you rarely need a separate dry-debris pass.
⚠️ Do not skip the hidden-area test on colored grout, older grout, epoxy grout, or unknown materials. It is the one step that catches damage before it happens.
Step 2: Steam and brush along the line together
Hold the nozzle about 1 inch (2.5 cm) from the grout and aim into the narrow channel — you are heating the line, not flooding the tile face. Move slowly enough for the heat to soften the grime, but keep the nozzle moving instead of holding it in one place.
This is the part most videos skip: with the brush attachment on the nozzle, the steam softens the residue while the bristles do the actual cleaning in the same pass. Work the brush-tipped nozzle along the line as you go. You should not have to grind it in — if you do, the grime is not soft enough yet, so give that spot another pass. For a stubborn or deeply darkened line, going over it a few more times does more than pressing harder once. On a shower wall, keep working top to bottom so dirty water does not run back over what you already cleaned.
Start on a low or normal setting. If the grime lifts easily, there is no reason to turn it up. Raise the steam level only for a line that is still stubborn after a couple of passes, and drop back down for caulk or epoxy grout.
⚠️ Parking steam on one point is where damage happens. Concentrated heat and moisture can stress cracked grout, soften caulk, or reach a sensitive surface behind the tile — controlled passes are safer than blasting.
Step 3: Wipe while it is still warm, then let it dry
Steam loosens grime; it does not make it vanish. While the residue is still warm and wet, wipe it away with a dry towel or cloth. If the cloth turns gray or brown, that is the grime leaving the surface — exactly what you want. Switch to a smaller brush for corners and edges, where a big brush can skate over the narrow spots buildup collects in.
Then let the area dry fully before judging the color. Wet grout looks darker than it is, so do not decide it needs a redo while it is still damp. If it dries and a line is still dark, that is your cue for one more targeted pass — not for cranking the machine to maximum on the first go.
Step 4: Reseal the grout after it dries
This is the step almost everyone leaves out, and it is why "clean" grout can look dingy again a month later.
Steam's heat can weaken the existing sealer on cement grout and open its pores, which leaves the line more absorbent — and easier to re-stain — than before you cleaned it. To close it back up, let the grout dry thoroughly (a common rule of thumb is a full 24–48 hours after your last steam pass, longer in a humid bathroom), then apply a grout sealer following the product's directions. Sealing is for porous cement grout; already-sealed epoxy grout does not need it.
⚠️ Do not reseal over damp grout. Sealer applied before the line has fully dried can trap moisture and haze, and it will not bond well.
What if the grout is still dark after all that?
If grout stays dark once it is dry and sealed, a few things could be going on. It may be stained below the surface, where steam cannot reach. It may be old, cracked, crumbling, or unevenly sealed. Or the dark look may be shadowing from a rough grout texture rather than fresh grime at all.
Steam is strong at loosening surface grime. It cannot reverse a permanent stain or repair damaged grout. If the line is cracked or crumbling, cleaning can improve the look, but regrouting or a color-seal is the real fix.
Where Goehner's SteamVex fits
Grout is a good example of why steam-cleaner specs matter. If you are still choosing a machine, our best handheld steam cleaners of 2026 roundup and 7-spec buying guide break down what to look for.
Very small handheld steamers can handle a short grout patch, but a tiny tank often makes you stop and refill mid-job. A traditional canister runs longer but takes more setup and storage. Goehner's SteamVex sits in the middle: a compact body with a hose and wand, a 1.6 L / 54 oz tank, 230°F / 110°C dry steam, and 50 PSI. The detail nozzle and brushes make it a natural fit for bathroom grout, kitchen tile lines, shower tracks, and window rails — the narrow spots where reach and controlled steam matter more than raw output.
But the honest part is worth repeating: the routine matters as much as the machine. Use the right brush, work in small sections, wipe while it is warm, and reseal after it dries. No steamer skips those steps for you.
See the Goehner's SteamVex handheld steam cleaner for the full spec sheet, and check the current price on the product page.
Frequently asked questions
Can you use a steam cleaner for grout, and does it really work? Yes — for surface grime, soap residue, and grease packed into grout lines, steam uses heat to soften the buildup so the nozzle's brush attachment can lift it out of the line, and a dry towel then picks up the loosened residue and leftover moisture. It does not bleach or repair grout; it loosens and removes surface soil so the line looks cleaner without a chemical spray.
Do you need a high-pressure or pressurized steamer for grout? Pressure helps push steam into the narrow grout channel, so a pressurized handheld (Goehner's SteamVex runs 50 PSI / 3.5 bar at 1,800 W) can reach buildup a low-output steamer leaves behind. Technique still matters — distance, brush choice, and wiping after each pass do as much as the pressure number.
Is a steam cleaner better than renting a grout cleaner? For regular home grout cleaning, owning a handheld steamer is usually more convenient than renting: no trip, no time limit, and you can use it on kitchen tile, shower tracks, and window rails too. A rental can make sense for a one-time whole-house deep clean, but for ongoing upkeep a machine you own tends to get used more often.
Can steam replace bleach or products like Zep for grout? For surface grime, steam plus a brush can loosen and remove buildup without a bleach or chemical grout product, which is the point of a chemical-free routine. Deep-set discoloration below the surface may still need a dedicated grout product — steam cleans the surface, it does not lighten a stain that has soaked in.


