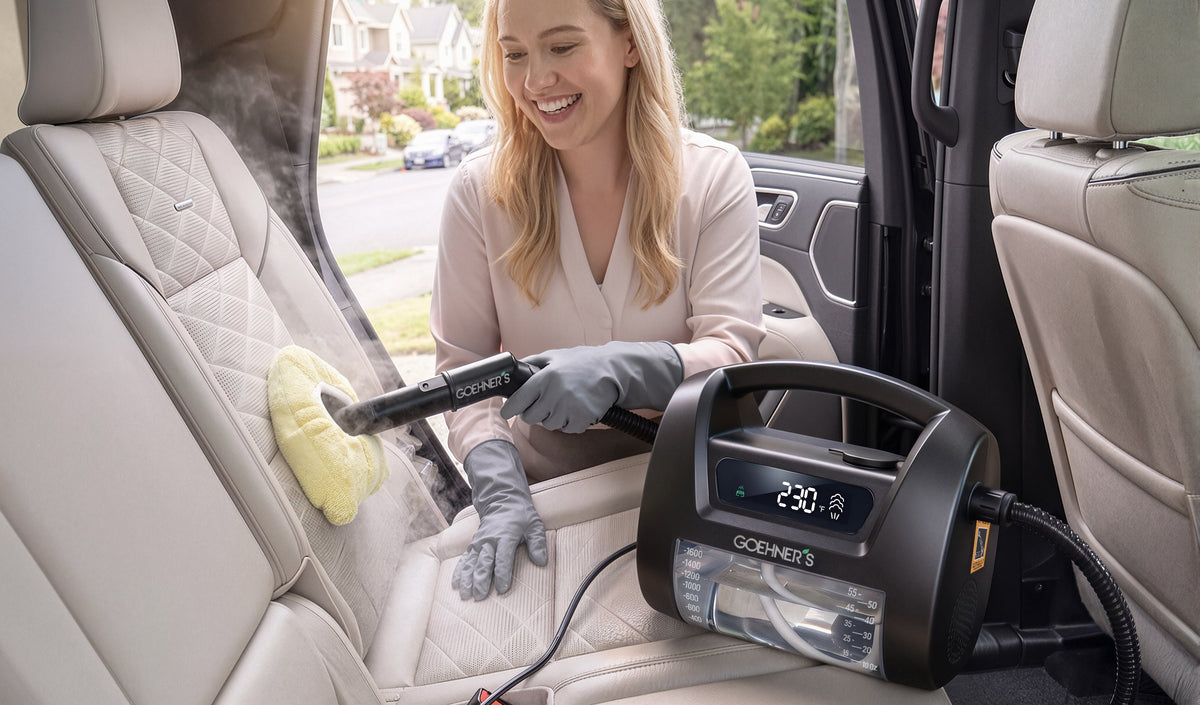
Detail Your Car With a Steam Cleaner: 30-Minute Workflow
The short answer
Pay yourself, with a handheld steam cleaner, and you can hit a comparable result in 30 minutes using nothing but tap water. The catch is that "nothing but tap water" only works if you follow a specific workflow. Random spraying produces blotchy results. The pros work in a sequence — and so should you.
Pay a professional auto detailer for an interior detail and you're looking at $150 to $350, a few hours of labor, and a cabinet of chemical cleaners that you'd rather not have your toddler licking off the seat belt afterwards.
Pay yourself, with a handheld steam cleaner, and you can hit a comparable result in 30 minutes using nothing but tap water. The catch is that "nothing but tap water" only works if you follow a specific workflow. Random spraying produces blotchy results. The pros work in a sequence — and so should you.
This is that sequence.
What you need before you start
- A handheld steam cleaner that reaches 230°F at 50 PSI (lower-spec units tend to struggle with dried-on grime)
- A long enough cord that you can reach the rear cargo area without unplugging and repositioning
- A bristle brush attachment (any kind — even a cheap one works)
- A microfiber bonnet attachment (for upholstery)
- Two clean microfiber towels
- One spray bottle of water — for pre-treating dried-on stains
That's the entire kit. No carpet shampoo. No leather conditioner. No vinyl protectant. Just hot pressurized water.
The workflow: 6 stages, 30 minutes
The order matters. Each stage prepares the next. Skipping ahead is how you end up doing the same area twice.
Stage 1 — Vacuum first (5 minutes)
Steam cleaning before vacuuming spreads dirt around. Vacuum the seats, footwells, and trunk first. Use the crevice tool between seats and along door panels.
Pro tip: Don't bother trying to vacuum the headliner. You'll just push lint into it.
Stage 2 — Floor mats out, steam them on the driveway (5 minutes)
Pull all the mats out of the car. Lay them flat on the driveway. Hit them with steam at full power, working from one corner to the other in overlapping passes. The bristle brush attachment is optional but helps lift packed-in dirt.
The mats will dry while you do the rest of the car.
Stage 3 — Door panels and dashboard (5 minutes)
Switch to a soft brush attachment. Set steam to medium and keep the nozzle moving with quick passes. On vinyl and plastic trim, the risk isn't the steam itself but heat held in one place — concentrated heat parked on one spot, especially on older, thin, or vinyl-wrapped surfaces, can soften adhesive or cause warping and discoloration. Most door panels and hard plastics clean safely when the heat is controlled and never held in one place.
Work top-down: dashboard first, then door panels, then center console. The steam loosens dust, oils, and the white haze that builds up on textured plastic. Wipe each section with a dry microfiber towel immediately after steaming — don't let the moisture dry on its own or it leaves spots.
- Steaming directly into the instrument cluster, head unit screen, or any electronic seam. Steam pressure can push moisture into electronics.
Stage 4 — Seats and upholstery (10 minutes)
This is where steam really earns its keep. It loosens grime that mild cleaners leave behind, using nothing but heat and tap water — no shampoo, no residue.
Switch to the microfiber bonnet attachment. The bonnet does two things: it spreads steam evenly so you don't soak the foam underneath, and it absorbs the dirt as it lifts.
Work in small sections, roughly a hand-span across. Hold the head a couple inches off the surface, move slowly. After each section, the bonnet will have visible dirt on it. Flip it or swap to a clean side.
For deep stains (kid juice, coffee spills, dog accidents): pre-treat with a quick mist of water from your spray bottle, wait about a minute, then steam. The water rehydrates the stain so the steam can lift it.
For leather: medium pressure, microfiber bonnet, no bristle brush. Work it lightly. Wipe dry with a clean towel.
Stage 5 — Carpet and footwells (4 minutes)
Footwells trap road grime, salt, and gravel dust. The bristle brush attachment is your friend here. Full power, overlapping passes, work the bristles into the carpet pile.
You'll see a remarkable amount of dirt come up — all of it loosened with hot water alone, no chemical spray involved.
Stage 6 — Vents, seams, and crevices (1 minute)
The detail brush attachment, full power. Run it along door seams, around the gear shift boot, into the vent fins, around the cup holders. This is the difference between "clean" and "showroom."
What to expect after you're done
The car will feel slightly damp inside. Roll all the windows down and let it air for 20 minutes. Don't drive yet — the residual moisture will pick up dust if you do.
There will be no chemical smell. None. This is the most underrated benefit of steam cleaning: you're not driving around for a week breathing fumes from a "fresh linen" spray. No detergent goes in, so no residue stays behind on the surfaces your family touches.
For context on the heat involved: high temperature is a long-standing principle behind chemical-free cleaning methods (think pressure cookers and pasteurization), and Goehner's runs at 230°F using only tap water — no added cleaners. We don't make any sanitizing or disinfecting claims for the unit; we just leave out the chemicals.
Why cord length matters
Reach is the make-or-break detail in a car interior. A short cord means you clean the front seats from the driver's-side outlet, then climb out, find an extension cord, plug back in, reheat, and start again to reach the rear seats.
Cord length on budget handheld steamers varies widely — advertised cords often run as short as about 9.8 ft on inexpensive pistol-grip models, which several reviewers note feels too short in real use, forcing you to switch outlets mid-clean. (Sources: Bob Vila, Family Handyman.)
A note on run time
Plan your sessions around how the steamer actually behaves. From a cold start it heats up in about 30 seconds; a warm restart takes only 5–10 seconds. On a full 1.6 L (54 fl oz) tank you get roughly 15 minutes of continuous steam on the highest setting, or up to about 30 minutes on the lowest. When the tank runs low, the standard refill routine is to press power off, top up the reservoir, and power back on — you're steaming again in about 30 seconds, with no long cool-down. For a full interior, that means a quick top-up partway through rather than abandoning the job.
The GOEHNER's at a glance
- Dry steam
- 230°F / 110°C
- Pressure
- 50 PSI
- Tank
- 1.6 L (54 fl oz)
- Heat-up
- ~30s cold · 5–10s warm restart
- Reach
- 13.2 ft cord + 5 ft hose = 18 ft
- Refill
- Power off, top up, on — steam in ~30s
The 30-minute number, honestly
The first time you do this, it'll take 45 minutes. You'll second-guess pressure settings, spend extra time on stains that scare you, and run out of clean towel sides. By the third time, you'll be at 30 minutes consistently. By the tenth time, you'll be doing it while listening to a podcast and barely thinking about it.
A scheduled drop-off vs. 30 minutes in your driveway
| What you compare | Professional interior detail | Do it yourself with steam |
|---|---|---|
| Cost | Typically $150–$350 each time | One-time tool, tap water only |
| Time | ~2 hours to a full day, plus a week's wait for the appointment | About 30 minutes, no appointment |
| Cleaners used | A cabinet of chemical sprays and conditioners | Nothing but hot tap water — no residue |
| How often it happens | Whenever you can schedule and drive across town | As often as you like, in your own driveway |
Cost
- Professional detail
- Typically $150–$350 each time
- DIY with steam
- One-time tool, tap water only
Time
- Professional detail
- ~2 hours to a full day, plus a week's wait for the appointment
- DIY with steam
- About 30 minutes, no appointment
Cleaners used
- Professional detail
- A cabinet of chemical sprays and conditioners
- DIY with steam
- Nothing but hot tap water — no residue
How often it happens
- Professional detail
- Whenever you can schedule and drive across town
- DIY with steam
- As often as you like, in your own driveway
Professional detailing prices per HomeGuide, 2026. Do-it-yourself figures reflect the workflow above.
For reference, professional interior detailing in the U.S. typically runs $150–$350 (a basic interior around $150–$200; a deep interior with shampoo, leather conditioning, and odor work $200–$350+), and takes anywhere from about 2 hours for a clean, well-kept car to a full day for heavily soiled vehicles — with prices rising for larger vehicles, pet hair, stains, or odors. (HomeGuide, 2026.) Compared to a detail you have to schedule a week out and drive across town to drop off, doing it yourself in 30 minutes is a real change in how often your car actually gets cleaned.
Want to make sure you don't damage anything? Read what NOT to use a steam cleaner on before your first detail. If you're still shopping, our buyer's guide on choosing a handheld steam cleaner is part of this series — keep an eye on the blog for it.
---
The workflow above was developed using the GOEHNER'S handheld steam cleaner — 230°F, 50 PSI, 1,800 W, 13.2 ft cord (plus a 5 ft hose for 18 ft of total reach), ~30-second heat-up. The specs aren't an accident; they're the threshold below which this workflow gets harder.
Frequently asked questions
Do I need to vacuum before steam cleaning my car?
Yes. Steam cleaning before vacuuming spreads dirt around, so vacuum the seats, footwells, and trunk first — then steam.
Can I steam clean leather car seats?
Yes, gently. Use medium pressure with a microfiber bonnet, no bristle brush, work it lightly, and wipe dry with a clean towel.
Do I need any chemicals or shampoo?
No. The entire kit is hot pressurized water — no carpet shampoo, no leather conditioner, no vinyl protectant — so no detergent goes in and no residue stays behind.
Is steam safe on my dashboard and plastic trim?
Most door panels and hard plastics clean safely when the heat is controlled and never held in one place. Keep the nozzle moving on medium, and avoid steaming directly into the instrument cluster, head unit screen, or any electronic seam.
How long does it take to detail a car interior with a steam cleaner?
Plan on about 45 minutes your first time and roughly 30 minutes once you've done it a few times, using the six-stage workflow above.
What do I do when the tank runs low mid-clean?
Press power off, top up the reservoir, and power back on — you're steaming again in about 30 seconds, with no long cool-down.


